How to Delete Contacts on iPhone

Top 5 Delete Apps


Recommended Guides
Table of Contents

How to Delete Contacts on an iPhone Easily and Quickly
There are many reasons for wanting to delete contacts on an iPhone. Maybe you have old business numbers that you no longer need, or perhaps you want to have a cleaner, slicker look on your phone now. You might also have duplicate contacts or others that you never really needed and aren’t even sure who they are or how they got there.
Whatever the motivation behind it, deleting contacts doesn’t need to be a huge or complicated task. By finding the method of deleting contacts that best suits you, this turns into a very simple task that can be done with no fuss.
When Should You Delete Contacts?
Most people will think about how to delete contacts on an iPhone when their phonebook becomes too messy. If you have had the device for a while then you might find that it is becoming increasingly cluttered.
As well as being an annoyance, this can also cause you problems in the case of trying to contact someone – especially so in an emergency. If you have lots of contacts with similar names then it is going to take you longer to choose the right one.
Periodically cleaning out your old contacts is a smart move that will make your phone easier to use and your contacts list more pleasant to look at. Once every six months is probably often enough for most people. However, if you tend to add a lot of new contacts regularly, then you might prefer to do it more often.
What to Avoid?
The biggest potential issue to avoid is that of deleting contacts that you might need at some point. It can be tempting to delete lots of entries once you learn how to delete multiple contacts on your iPhone. Yet, are you really sure that you will never need to get in touch with that person again?
If you are in any doubt, then it is best to hold off. You can wait until the next time that you are deleting your old contacts and consider it again at that time. While it is nice to use a duplicate contacts remover on contacts you no longer need, it isn’t something that you should rush into if there are any doubts at all.
So, without further ado, here is how to delete contacts on your iPhone:
Method One: Choose One Contact at a Time on Your iPhone
One approach is to manually remove the iPhone contacts one by one on the device. Of course, this can be fairly time-consuming, but it lets you control the whole process. If you have numerous contacts, be prepared to patiently work through them all.
- Open up the Contacts app
- Press the name of the contact you want to delete. If you need to search for someone, you can use the search bar for them.
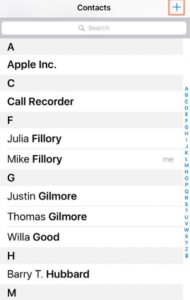
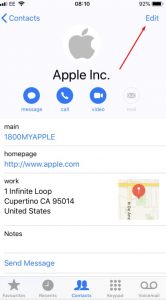
- Once you’ve found your contact, tap their name.
- Choose the Edit option in the top-right of the screen.
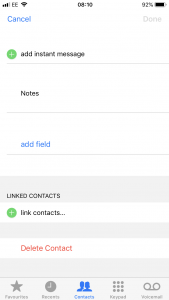
- If you scroll down you will see the option to Delete Contact at the bottom. Tap this.
Please bear in mind that this method will also delete the contact from any other device that is connected to your iCloud account.
Method Two: Delete All Contacts from Your iCloud Account
In this second method, you are going to use your iCloud account to remove all of your contacts from the phone. This is a drastic measure that you are probably going to want to take in exceptional circumstances. You aren’t just deleting a chosen contact or two.
- Tap your iPhone’s Settings icon. Choose your Apple ID and sign in if you aren’t already signed in. Choose the iCloud option from the list.|
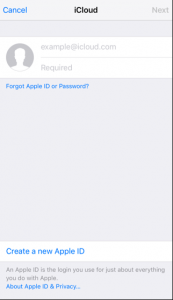
- Move the Contact to Off. You will see that it turns white and then prompts you to delete all of your iCloud contacts that are stored on the phone.
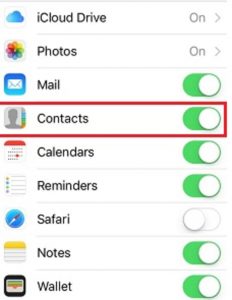
Keep in mind that if you choose Delete from My iPhone, you will be removing all of the contacts that are currently synced with your iCloud account
Method Three: Delete Contacts from Facebook
The next method is for anyone who has contacts from Facebook. The previous steps won’t remove the contacts that you have from Facebook. This can be frustrating if you have taken the time to clear out old contacts but still have some that won’t disappear. Thankfully, there is a way of removing all of these unwanted contacts as well.
- Go the Settings tab. Choose the Facebook option. Find where it says Allow These Apps to Use Your Account.
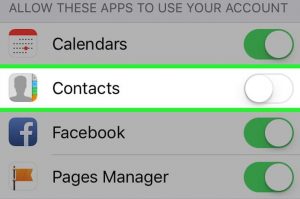
- Move the slider to the off position.
You will now see in your Contacts that any people merged from Facebook have been removed. You can’t just choose certain contacts to delete with this method, though – it will have to be all of them.
Method Four: Hide Contacts by Putting Them into Groups
What if you want to tidy up your contacts but aren’t sure if you are ready to take the definitive step of deleting contacts from your iPhone? You might like the alternative of splitting them into groups so that many of them are hidden from sight.
- To create a contacts group, you’ll have to visit iCloud on your Mac or PC and log in.
- Click the plus sign in the bottom left corner of your Contacts.
- Choose New Group.
- Add the Group name and start dragging and dropping the contacts you want hidden.
Now that you’ve set up the group, you’ll have to go to your iPhone to hide this group:
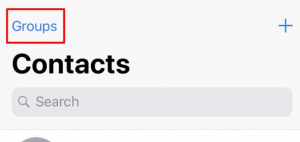
- Open your Contacts app.
- Hit the Groups option near the top of the Contacts screen.
- Choose the groups to be hidden by putting a checkmark beside them.
- Choose Done
Method Five: Choose a Suitable App
As you can see, the above steps can be quite cumbersome. The easiest move of all is to find an app that lets you discover how to delete contacts on iPhone fast and safely. This isn’t difficult at all, as the Easy Backup app for iOS devices is currently available on the App Store. You’ll have to download it, wait until it installs and open it up. Then:
- Look at the list of unnecessary contacts. These are contacts you have never used or that lack essential information such as name or phone number.
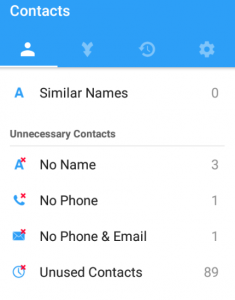
- Choose one of the different categories. For example, the No Phone screen is shown below.
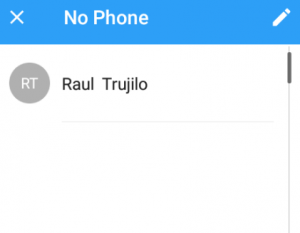
- Choose Delete from the top of the screen.
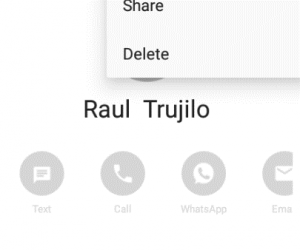
- Confirm that you are happy to delete.

By completing this process, you will very quickly get your iPhone looking good again. If that long list of old and unnecessary phone or SIM contacts has been getting you down then you will be delighted to finally sort it out so easily.
Remember, you can also find out how to back up contacts on an iPhone to make your device even easier to use.
Comments