How to Import Contacts to iPhone
Table of Contents

We all know how crucial our contact lists can be in our modern lives. From business to pleasure, our reliance on being able to store contacts with ease has caused our lists to balloon in size, which can cause issues. These digital systems are the most convenient, that much is true, but transferring all of this data by hand is untenable, and the built-in systems of transfer can be tedious at best.
With that in mind, we’ve created this guide to help users overcome any of the problems that can commonly occur with transferring contacts onto an iPhone. Our simple tutorial will help show you the easiest possible solution to avoid stress and wasted time and get you back to the important things.
Getting Started
There are many reasons why a user might want to import contacts to iPhone devices, including:
- Changing over from an Android phone
- Upgrading from an older phone
- The unexpected loss of another device
- Contact list sharing between family or workmates
Whatever your reasons for importing, before you begin you need to be sure everything is set up and ready to go. The first step on this front is to ensure that you have a reliable internet connection ready and that any battery-powered device you intend to use is sufficiently charged.
The next step is going to depend on which method you wish to use to export your existing contacts. Below, we have listed the three most common methods:
- Manually backing up through Google for Android and iCloud for iPhone
- Transferring via SIM
- Using the Easy Backup App
The first two of these options can be confusing and cumbersome for many users, so we would suggest most users jump to Method 3 below. Otherwise, choose whichever method you prefer and head on down to that section.
Let’s get started.
Method 1: Google and iCloud Transfers
As two of the older methods, these operate in much the same way. The difference here is that Google backups are going to be of use for Android users, whereas iCloud is going to be used for iPhone users. To follow the right method, head to the applicable section below.
Step 1:
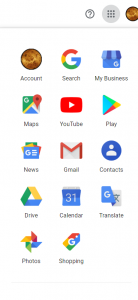
The first thing you’ll want to do is find the option in your service or device to export your contact lists. This is a standard feature, so it shouldn’t be too difficult to find. For Google, this means logging into your account and then selecting the Main Menu option from the top-right of the screen.
Step 2:
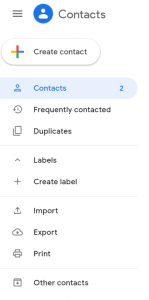
This will bring you to the contact page. Here you will want to find the Export option. This is found on the three horizontal bar icon up the upper-left of the screen. Click on this and then press export. You might need to expand the bar to show this option first.
Step 3:
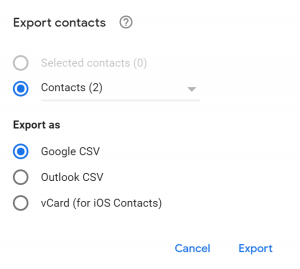
Once you select this option, Google will ask you which file format you prefer. Since our destination is an iPhone, choose the vCard option and press Export.
Step 4:
Clicking Export will then create a file that you need to transfer onto your iPhone. This is a matter of attaching it to an email and sending that email to yourself. Once this has been sent through, open the email on your target device, download the attachment, and then run the file. You should then be guided through the rest of the way.
If for some reason this doesn’t work, we would suggest moving to Method 3 below.
iCloud
Step 1:
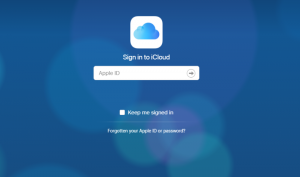
Working with iCloud means you must first log into your account. This can be accomplished by navigating to Apple’s dedicated iCloud site and entering your Apple ID and Password.
Step 2:
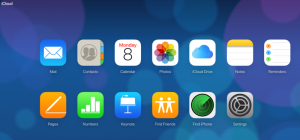
Once in your iCloud account, head to your contacts list by pressing the Contacts icon.
Step 3:
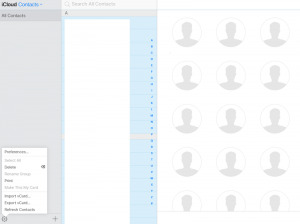
For iCloud, you will need to either individually select the contacts you wish to export or press Select All to instantly choose all of them. Once this is done, select Export.
Step 4:
This will save a file, which you need to then transfer onto your target iPhone. Email is the easiest way to achieve this. Send an email to yourself with this file as the attachment and open the email on the iPhone to which you wish to import these contacts. Download the attachment onto the iPhone. Once this is on your phone, open it and the phone will guide you through the rest of the steps.
If for some reason this method did not work, we recommend trying out Method 3.
Method 2: SIM Backups
Sim backups can be a little trickier. Not every SIM card will fit in every phone, and the variety of different phone systems can mean there are many slightly different methods. That said, there are a few basic steps which apply to each device, so we’ll hit on all of the main steps.
Step 1:
Ensure that your previous phone has its contacts stored on its SIM card. Almost all phones do this automatically, but some, as with modern iPhones, do not rely on this method of storage. To ensure that SIM storage is being used, go to your contact list on whatever device you have and open the options.
Step 2:
On the options screen, enter the Import/Export section. You should see an option named Export to SIM, or something similar. Select this and follow this process to completion.
Step 3:
Completely power off your device and remove the SIM card.
Step 4:
Completely power off your new device and insert the SIM card. Now power your new device on.
Step 5:
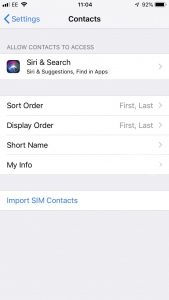
Once the iPhone has booted, head on into the settings screen, then select Contacts. At the bottom of the screen, you will see an Import SIM Contacts button. Select this and follow the instructions. This should complete the process.
If you had any issues, or this did not complete, we recommend heading on Method 3.
Method 3: Using the Easy Backup App
This is the easiest method for exporting and importing contacts, as it only requires two or three simple components:
- Backup old device
- Import to new device
- Clean up duplicate contacts (optional)
So, ensure the Easy Backup App is installed on your old and new device via the Play Store for Android and/or the App Store for iOS so you can get started.
Step 1: Backup
Open the app on your old phone. You will be tasked with associating an account with this device, so select Facebook or Google, whichever you prefer. Be sure to remember which option you choose, as you will need to log in to the same account in order to import later.
Following this, you will be greeted with the main page.
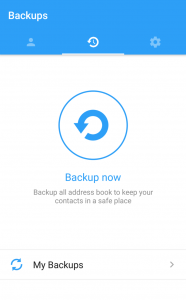
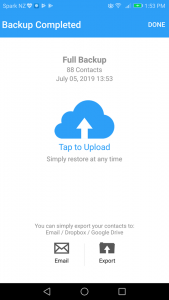
On this page, simply press the backup button in the center and proceed to the next screen. Here you will be given two separate options to save your contacts: uploading to the cloud or creating a separate file. We recommend the cloud option for simplicity’s sake. All this requires is you to press upload, wait a few moments, and you’re done.
On this page, simply press the backup button in the center and proceed to the next screen. Here you will be given two separate options to save your contacts: uploading to the cloud or creating a separate file. We recommend the cloud option for simplicity’s sake. All this requires is you to press upload, wait a few moments, and you’re done.
Step 2: Import
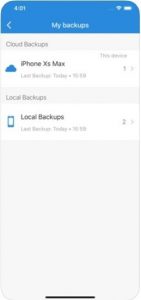
Open the Easy Backup app on your new device and log in with the same account which you used in Step 1. Once you’re back at the main page, select My Backups at the bottom of the screen.
On this page, all you need to do is press on the Cloud Backups option and follow the prompts.
All done, simple as that!
Step 3: Clean duplicates
If you have old duplicates in your list, we recommend heading over to our guide on removing duplicates to clean these up.
Ensuring Future Safety
To keep everything running smoothly in the future, we would recommend using Easy Backup at least once a month to store your contacts into the cloud. This way no matter what happens to your device in the future, retrieving this information is as simple as logging in and selecting the option to restore.
Comments